
When you first dive into the world of soil-free growing, the initial enthusiasm is often met with a stark reality check: the price tag. While the concept of growing fresh basil in your kitchen is appealing, browsing high-end hydroponic appliances can be a shock to the wallet.
As you explore Hydroponics 101, you learn that the science is relatively simple. This leads to the inevitable question: Do I really need to spend $300 on a plastic box with a light, or can I build one for $50?
The answer is nuanced. It depends on your mechanical aptitude, your aesthetic requirements, and your production goals. In this analysis, we will strip away the marketing hype and look at the raw numbers of building versus buying, using a standard Deep Water Culture (DWC) model as our baseline.
The Pre-Made Kit: Paying for Convenience and Design
In the modern market, hydroponic kits generally fall into two categories: the "smart" countertop appliance (like AeroGardens) and the utilitarian growing system (like pre-drilled buckets or NFT channels).
The Economics of Kits
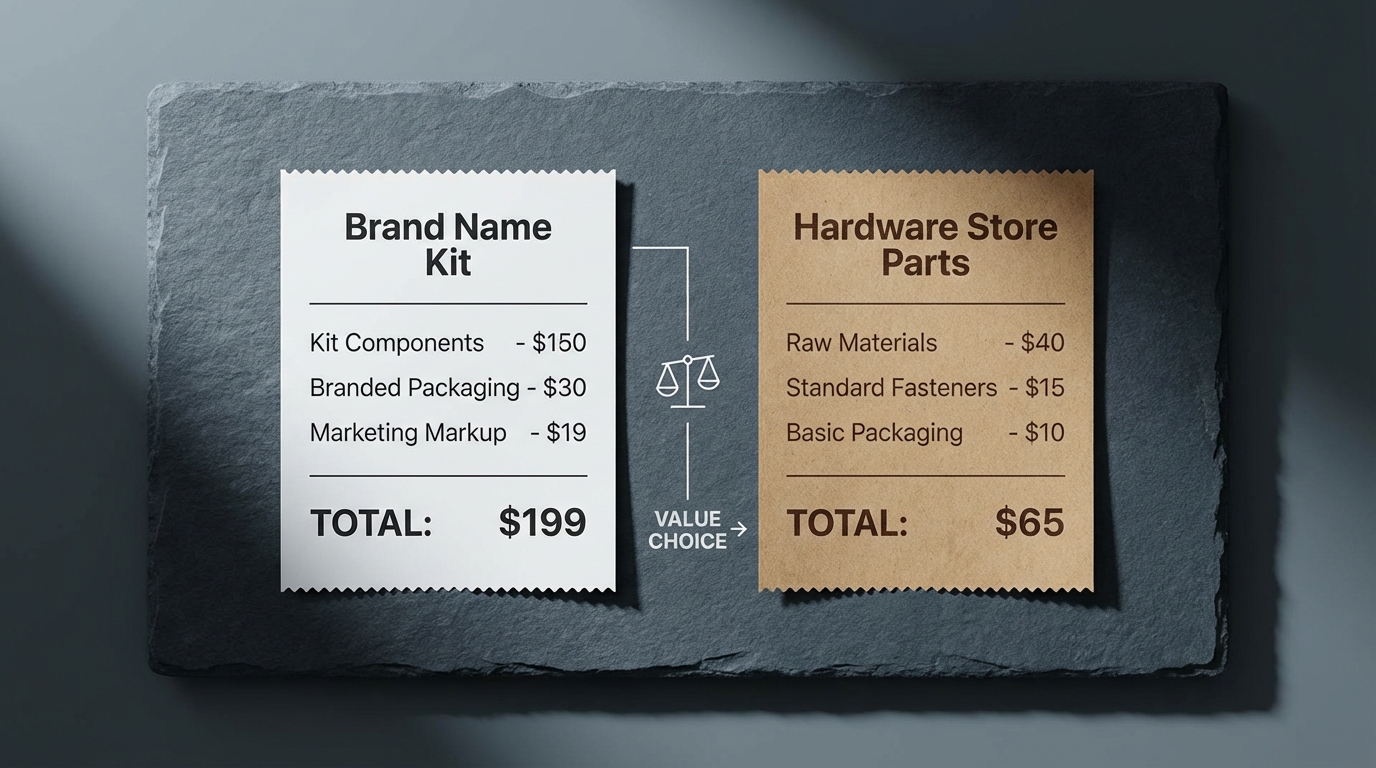
When you purchase a kit, roughly 40% of your money goes toward hardware. The remaining 60% pays for engineering, packaging, aesthetics, and user support. For a beginner, this premium buys peace of mind.
- Entry-Level Countertop Systems ($60 - $150): These usually support 3-6 small plants. They include integrated LED lights (a major cost factor) and timers. The cost per plant site is high, roughly $25/plant.
- Mid-Tier Bucket Systems ($100 - $250): These are often 4-bucket DWC setups connected to a central reservoir. While they look industrial, they come with pre-drilled grommets and guaranteed leak-proof seals.
- High-End Vertical Towers ($500+): These optimize vertical space and often use Aeroponics. Engineering a DIY version of this that doesn't leak is difficult, justifying the high price tag.
If you are looking for specific architectures, reviewing the 6 Types of Hydroponic Systems can help you decide which kit complexity is worth the money. For example, a simple wick system kit is rarely worth buying, whereas a complex NFT kit might be.
The DIY Route: Sweat Equity and Scalability
The DIY route is favored by those who view hydroponics as a hobby of building as much as growing. The primary advantage here is not just cost savings, but modularity. If you build it, you know how to fix it.
The Hardware Store Bill of Materials
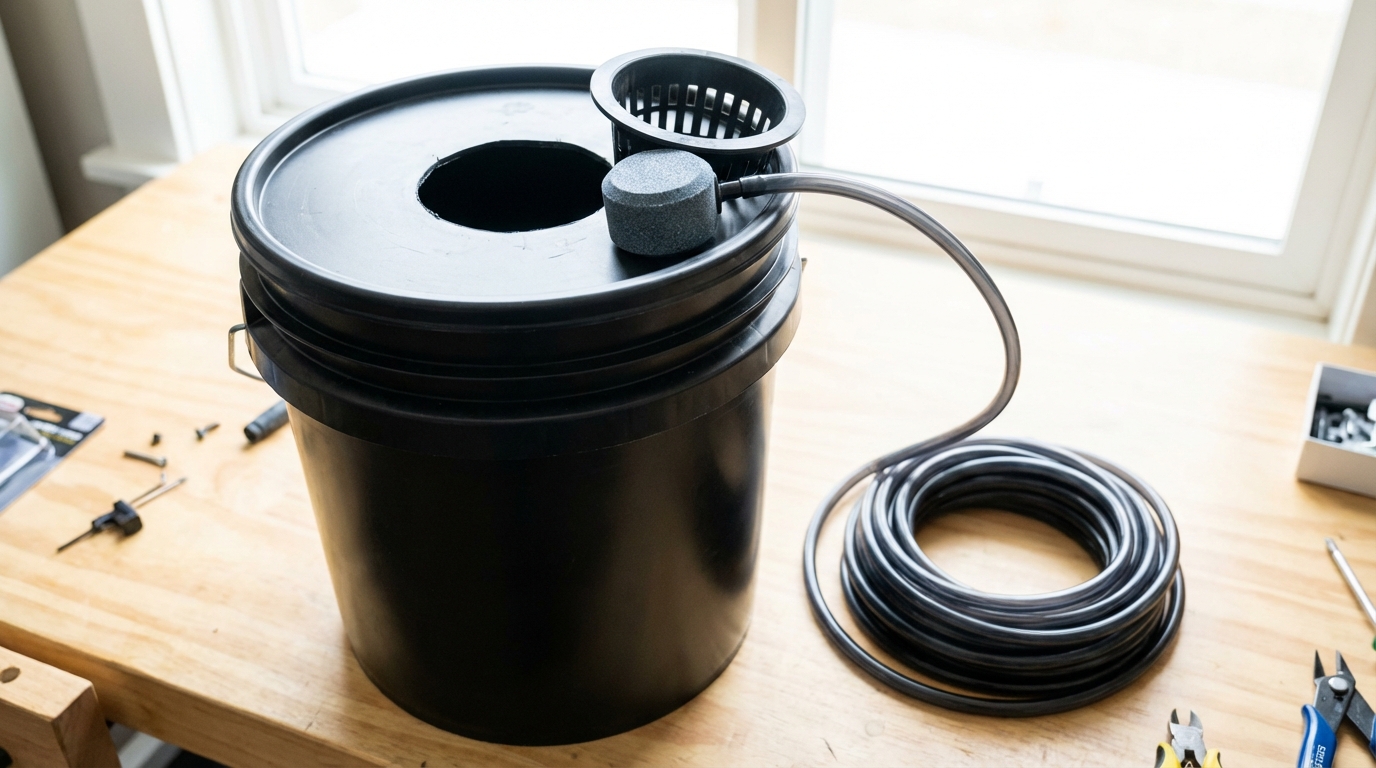
Let's simulate a build for a single-bucket DWC system, widely considered the easiest entry point.
| Component | DIY Estimate | Kit Equivalent |
|---|---|---|
| Reservoir (5 Gal Bucket + Lid) | $8 - $12 | $25 - $40 |
| Air Pump & Stone | $15 - $20 | $30+ |
| Net Pot & Medium | $5 | Included |
| Tubing & Fittings | $5 | Included |
| TOTAL HARDWARE | ~$35 - $42 | ~$55 - $80 |
The Verdict: You save approximately 50% by sourcing your own parts. However, this assumes you already own basic tools like a drill and hole saws. If you need to buy tools, the first bucket becomes significantly more expensive.
The Great Equalizers: Costs You Can't Avoid
A common pitfall in cost analysis is looking only at the growing container. Whether you buy a $500 sleek unit or use a $5 storage tote, the biological requirements of the plants remain the same. There are several costs that neither route can mitigate.
1. Lighting Systems
Unless you are growing in a greenhouse or a sunny windowsill, you need grow lights. Smart kits include them, which skews the price comparison. For a DIY setup, a decent full-spectrum LED panel will cost between $60 and $150. When you add this to your DIY bucket cost, the price gap narrows.
2. Nutrients and Chemistry
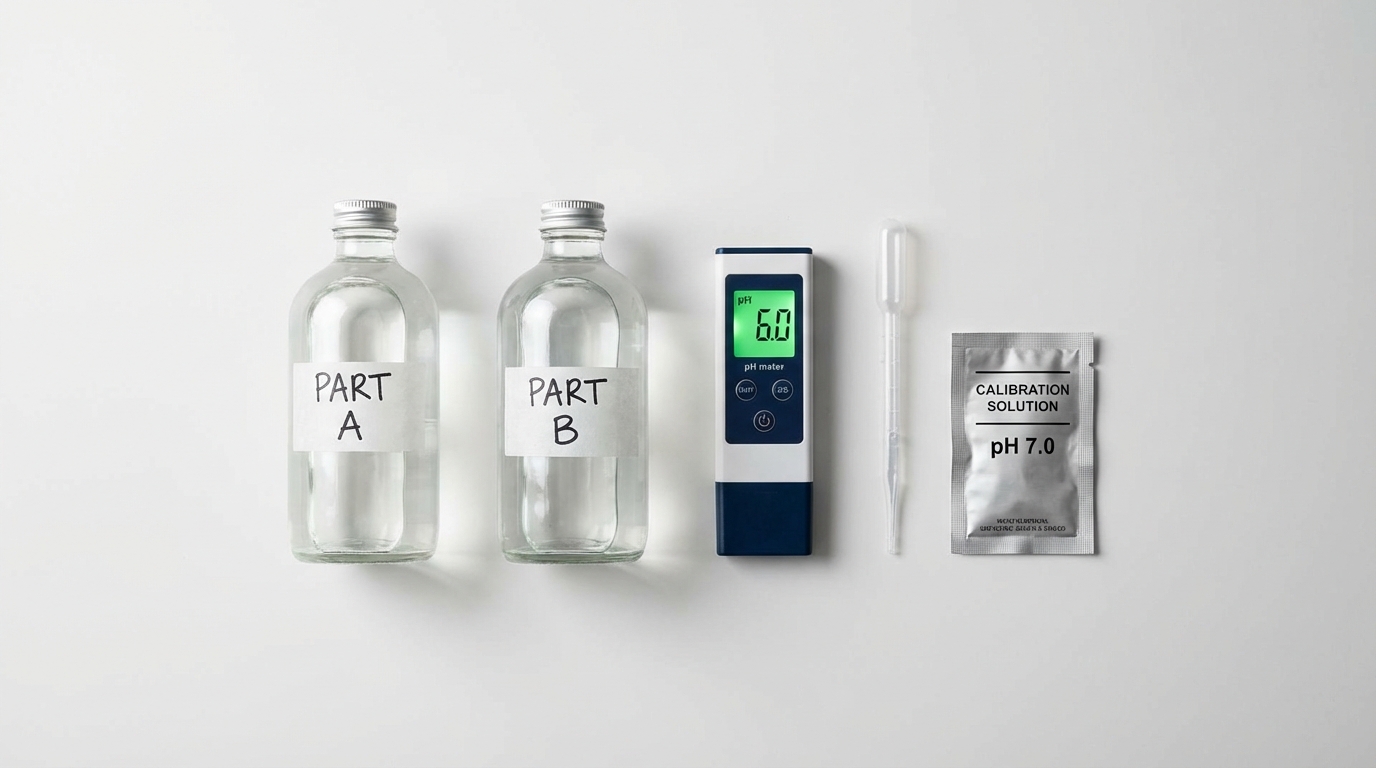
Your plants need food. High-quality liquid fertilizers and pH control kits are mandatory. As detailed in our guide on Nutrients and pH Management, balancing your solution is key to success. You cannot "DIY" chemicals easily; you must purchase them. Expect to spend $30-$50 initially on a nutrient starter pack and pH testing kit, regardless of your system type.
3. Seeds and Substrates
While you can save seeds, most beginners buy them. Furthermore, substrates like rockwool, clay pebbles, or coco coir are consumable costs. Choosing the Best Plants to Grow can mitigate this; lettuces have a fast turnover, giving you more value for your operational costs compared to slower-growing peppers.
Hidden Factors: Aesthetics and Risk
Cost isn't just financial; there is a social cost to your living space. A DIY system often looks like a science experiment. It usually involves industrial grey or black plastic, humming pumps, and exposed wires. If you live in a small apartment or plan to put the garden in your living room, the "Wife Acceptance Factor" (or partner/roommate acceptance) of a sleek, pre-made kit is a tangible value.
Risk of Failure:
DIY systems are prone to leaks if seals aren't perfect. A 5-gallon leak on a carpeted floor can cause hundreds of dollars in damage, instantly negating any savings from building the system yourself. Kits are generally pressure-tested and molded to prevent this.
Final Recommendation
Who wins the battle of the budget? It depends on your profile:
- Buy a Kit If: You are an absolute beginner, you have limited space, you care about interior design, or you want to grow small herbs without hassle. The extra $50-$100 is worth the guarantee of a working system.
- Build DIY If: You have a garage or basement, you own power tools, you plan to scale up to feed a family, or you enjoy the engineering challenge. The savings compound significantly; building 10 buckets is vastly cheaper than buying 10 kits.
Once you've made your decision and secured your budget, the next step is getting your hands wet. If you're ready to start, head back to our Ultimate Guide to map out your growing journey.